
A while ago I wrote a blog post on setting up continuous integration for Laravel with Jenkins. That was for Laravel 4, and many things have happened since. In this post I widen the scope and aim for continuous integration (CI) for PHP applications in general. Applications are looking more and more similar to one another in terms of structure and tooling, which allows for a more general approach to them. Jenkins & PHP work perfectly together and Jenkins is a great tool if you want full control of your CI process since everything is open source and it has a huge and active community.
Jenkins is an open source continuous integration server that is a swiss army knife. CI is the process of performing static code analyses and running tests for an application on a regular basis, often on a push to a repository. Jenkins will poll that repository for changes and as soon as anything happens it will pull down the changes and perform all specified tasks. It’s also possible to allow Jenkins to listen to incoming webhooks for triggering updates. The kind of analysis to be performed is up to each application, but generally you look for errors, run tests, run static analysis tools and then have Jenkins generate a nice visual report for looking at the results.
Once you have everything up and running you can sit back and relax, but before that you need to do some configuration and it can be quite complex. Configuration is mostly done in XML and that is never fun to deal with. I’ll guide you through this process in this post and provide you with some code that you can reuse in your project. I want to give a big shout out to the project that I have used as a reference for this tutorial, with slight modifications to it, and that is http://jenkins-php.org.
For this tutorial I will set up a Jenkins job for CI on the Zend Expressive framework, instead of a Laravel application. I have a fork of the framework on Github, where I have added the necessary files for the CI process (explanation below how you do that in your own repository), which Jenkins will poll for changes and build. In this tutorial I’ll be installing Jenkins on a machine running Ubuntu 14.04.
Why care about Jenkins & PHP continuous integration?
Code quality
Every other argument for CI ends up in this category. Delivering high quality software is not an easy task, and CI is one of the best tools for helping you in achieving that. It makes sure to run the tests and generate reports for code coverage. Also it performs static analysis on your code and provide you with visual reports for it. This provides you with solid metrics about the health of your code.
Automation
When running tests automatically on every push, you don’t have the issue of tests not being run before a deploy because of human error. You could automate your whole deployment process if you’d like to as well.
Find bugs faster
Since you are doing continuous integration, you don’t have to worry about a long integration period later. You can catch bugs earlier in the process and prioritize fixing them before they cause any problems. It isn’t some magic silver bullet for getting rid of bugs, but it allows you to react to them faster.
Developer confidence
When you know that tests are being run on each push, you gain confidence in your code since you will know if your new code breaks any tests. Or it could be as easy as your code not passing the linter.
Reduces the release cycle
You increase confidence when you make sure that builds pass all tests you have automated, which allows for more efficient deployment. The distance between your local environment and your production environment decreases.
Visibility and communication
With a process that is open to everyone, you and your team will be able to see what is going on and communicate about it with more ease. And with higher transparency comes the benefit of less dense domain knowledge on some “experts”, and hopefully spread the domain knowledge more even between team members.
Team pride
Call this what you will, but I like the term team pride. When you achieve a culture of pride for good quality code in your team, you’ve come a long way. I’m not talking about pride as in “I wrote this code, don’t fuck with it”, I’m talking about “I wrote this code, it has tests, is well documented, well decoupled and does not break the build. Let’s discuss further improvements on it”. Gathering as a team around code quality, taking pride in increasing the trend of code coverage and decreasing the code style violations is a powerful mentality.
Preparing your application
You need to add some configuration files and a build directory to your repository. These can be found in my php-jenkins repository. Follow the instructions setup there, it’s only about adding some files to your project and possibly changing some paths in them.
Installing Jenkins
We’ll add the Jenkins repository, install Jenkins and a few other dependencies.
1
2
3
4
wget -q -O - https://pkg.jenkins.io/debian/jenkins-ci.org.key | sudo apt-key add -
sudo sh -c 'echo deb http://pkg.jenkins.io/debian-stable binary/ > /etc/apt/sources.list.d/jenkins.list'
sudo apt-get update
sudo apt-get install -y jenkins ant git-core curl unzip
If the installation says it encountered any errors, just start the service manually
1
sudo service jenkins start
Wait for a while to let it boot up, and then go to the URL of your server with port 8080. I have a Vagrant machine with a host named jenkins so I’m using http://jenkins:8080. It will prompt you for the initial admin password it has generated for you. Retrieve it with
1
sudo cat /var/lib/jenkins/secrets/initialAdminPassword
After that you may skip the getting started guide and view Jenkins in all its glory.
Switch over to the user jenkins that have been created. From now on we’ll run most commands as this user. This is to make sure that everything works for when we’re making builds later on since this is the user that Jenkins uses.
1
sudo su jenkins
Let’s also save the user and password for when we’re going to use the CLI tool.
1
2
3
echo 'JCLIUSER=admin' >> ~/.bashrc
echo 'JCLIPASS=<YOUR_PASSWORD>' >> ~/.bashrc
source ~/.bashrc
Security settings
Now we need to fix a security setting to be able to use the CLI tool. Go to Manage Jenkins, then Configure Global Security. You’ll find TCP port for JNLP agents that is set to disabled. Click Fixed and set any port you’d like, 8088 for example. While you’re there, also set the markup formatter to Safe HTML so we can display images in our project description. Then hit Apply. Warning, do not hit Save here! For some reason it throws an error for me when hitting save instead of apply.


Install plugins
Let’s install the plugins we need for making Jenkins & PHP play nice together. And in order to do that we first need to download the CLI tool.
1
2
3
4
5
6
wget http://localhost:8080/jnlpJars/jenkins-cli.jar
java -jar jenkins-cli.jar -s http://localhost:8080 install-plugin \
    checkstyle cloverphp crap4j dry htmlpublisher jdepend \
    plot pmd violations warnings xunit git greenballs \
    --username $JCLIUSER --password $JCLIPASS
java -jar jenkins-cli.jar -s http://localhost:8080 safe-restart --username $JCLIUSER --password $JCLIPASS
This will also install the plugin to display green balls on passing builds instead of blue ones. Why they’re blue from the start is because of Japanese culture where you say you have a blue light instead of green when driving in traffic, and the original author of Jenkins grew up there. Quite fascinating. :)
Installing PHP, Composer and tools
In order to achieve CI with Jenkins & PHP, we of course need PHP installed. Exit from the jenkins user, install PHP7.0 and some extensions that are required. Which PHP version you choose to install is up to you and your application’s needs. I tend to use PHP7.0 when I can because of the performance improvements. To install PHP5.4, replace all instances of php7.0 with php5 in the following commands. Or to install PHP5.6, replace all instances of php7.0 with php5.6.
1
exit
1
2
3
4
sudo LC_ALL=C.UTF-8 add-apt-repository -y ppa:ondrej/php
sudo apt-get update
sudo apt-get install -y php7.0 php7.0-xdebug php7.0-xsl php7.0-dom \
    php7.0-zip php7.0-mbstring
Installing Composer
In my last post we used PEAR to install the tools we needed, but this time we’ll use Composer instead to install them at the global level. So first we install Composer.
1
2
3
4
php -r "copy('https://getcomposer.org/installer', 'composer-setup.php');"
sudo php composer-setup.php --install-dir=/usr/local/bin --filename=composer
php -r "unlink('composer-setup.php');"
sudo chown -R $USER:$USER ~/.composer/
Installing tools
Now switch back to the jenkins user and install all tools we need.
1
sudo su jenkins
1
2
3
4
5
composer global config minimum-stability dev
composer global config prefer-stable true
composer global require phpunit/phpunit squizlabs/php_codesniffer \
    phploc/phploc pdepend/pdepend phpmd/phpmd sebastian/phpcpd \
    mayflower/php-codebrowser theseer/phpdox:dev-master
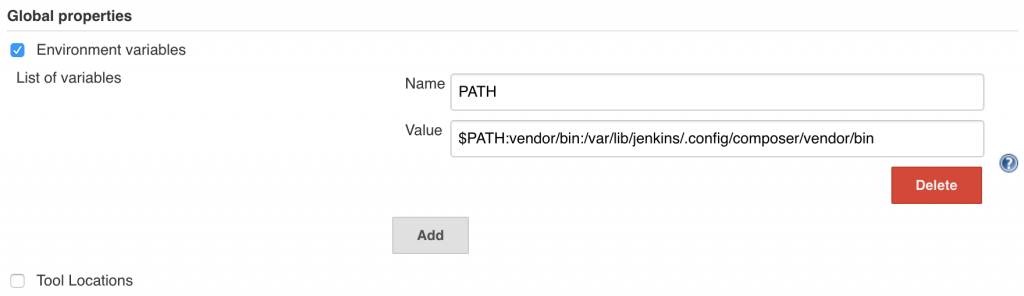
These are all the tools we need for running our tasks, however Jenkins will not be able to find them when running our builds. We need to add the composer directories to PATH. Go to Manage Jenkins, then go to Configure System. Under Global properties, click the check box for Environment variables and set the name to PATH and the value to $PATH:vendor/bin:/var/lib/jenkins/.config/composer/vendor/bin, then save_._ This ensures that Jenkins tries to use the project’s local dependencies first, then fall back on your global packages.
Zaher Ghaibeh pointed out in the comments that on Ubuntu 16 with PHP7, the value should be set to $PATH:vendor/bin:/var/lib/jenkins/.composer/vendor/bin/ instead.
The tools
In total we installed eight tools through composer, let’s go through them one by one to give you a general overview on the metrics they will provide. Without these tools there is no benefit of Jenkins & PHP together, since they provide all data necessary for our builds.
PHPUnit
This one I don’t think I really have to explain, it is responsible of running our unit tests and generate code coverage.
PHP_CodeSniffer (phpcs)
Detects violations of a specific code style. The debate about whether we should even use a code style is a heated one, but I think it’s a good idea and I don’t have time to explain why here. Configuration files I provided for this tool uses the PSR-2 code style, probably the most widespread code style within the PHP community.
phploc
Number of lines of code, number of classes, number of interfaces, etc. Nothing fancy, pretty straightforward metrics about your code. Do what you wish with it. What could be interesting is if your code is depending on global stuff, might be a code smell.
pdepend
This tool shows you the quality of your design in the terms of extensibility, reusability and maintainability. – The project
This provides some very advanced metrics for your project. If you want to dive deeper I suggest going to the documentation for the software metrics.
PHPMD – PHP Mess Detector
This provides some very good metrics of your code quality. I have a blog post explaining the metrics: NPath complexity and cyclomatic complexity explained.
PHP Copy/Paste Detector (phpcpd)
Just as the name suggests, it tries to determine where you have duplicated code in your project.
PHP_CodeBrowser (phpcb)
Generates a browsable output for your project files. If you have done a good job of using phpdoc in your project, this will give you some good value.
phpDox
Generates API documentation for your project.
Setting up the build project
We now need a job for our Jenkins & PHP project. This we’ll do by adding a boilerplate job that we’ll use as a base for the job. Once we have everything set up you may remove it if you want to.
1
2
curl -L https://raw.githubusercontent.com/modess/php-jenkins-template/master/config.xml | \
 java -jar jenkins-cli.jar -s http://localhost:8080 create-job php-template --username $JCLIUSER --password $JCLIPASS
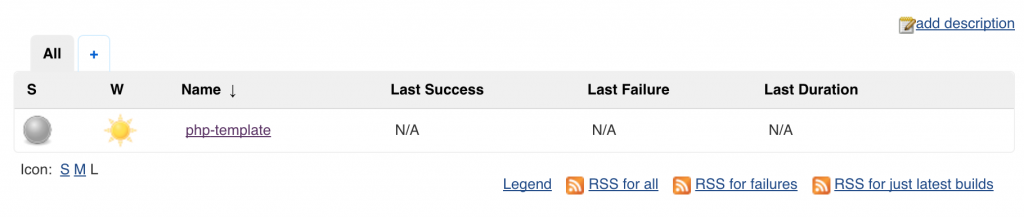
Refresh the home location for Jenkins and you should see a disabled job named php-template. It contains all the configuration for running tools, parsing output and processing it to a format that Jenkins can display.
We’ll use this template by duplicating and customizing it for our application’s job. Start by clicking New Item in the left side menu.

Fill in the name of the project and choose to copy from the template job.

Click OK to continue.
We want to poll our git repository for changes so it makes a new build on each push. I’ll use my fork of Zend Expressive (https://github.com/modess/zend-expressive-jenkins.git) with the build files committed.

Add the polling every minute (* * * * *), don’t worry about the warning. A better solution for this would be to listen to a webhook when changes are pushed to the repository, but that might be a separate post.

Hit Save, and that’s all we need. Enable the job and it will perform the first build (once it polls the repository), hopefully it will be a successful one.

What now?
Now that you have Jenkins & PHP set up and running, I suggest you click around in the interface and get familiar with it. Look at the metrics provided for you and try to get a feel of what they tell you and why you should try and improve them.